SYSTEM: Water level sensors on all Bosch ECM Controlled Water Tanks
AFFECTED TANKS: All tanks manufactured after 1/31/2023
REASON: Debris buildup on sensor probe in water tank causes failure to the button on the end of the sensor.
COMPLETION: Sensor replacement.
PRODUCT UPDATE: Install new sensor.
STEP ONE
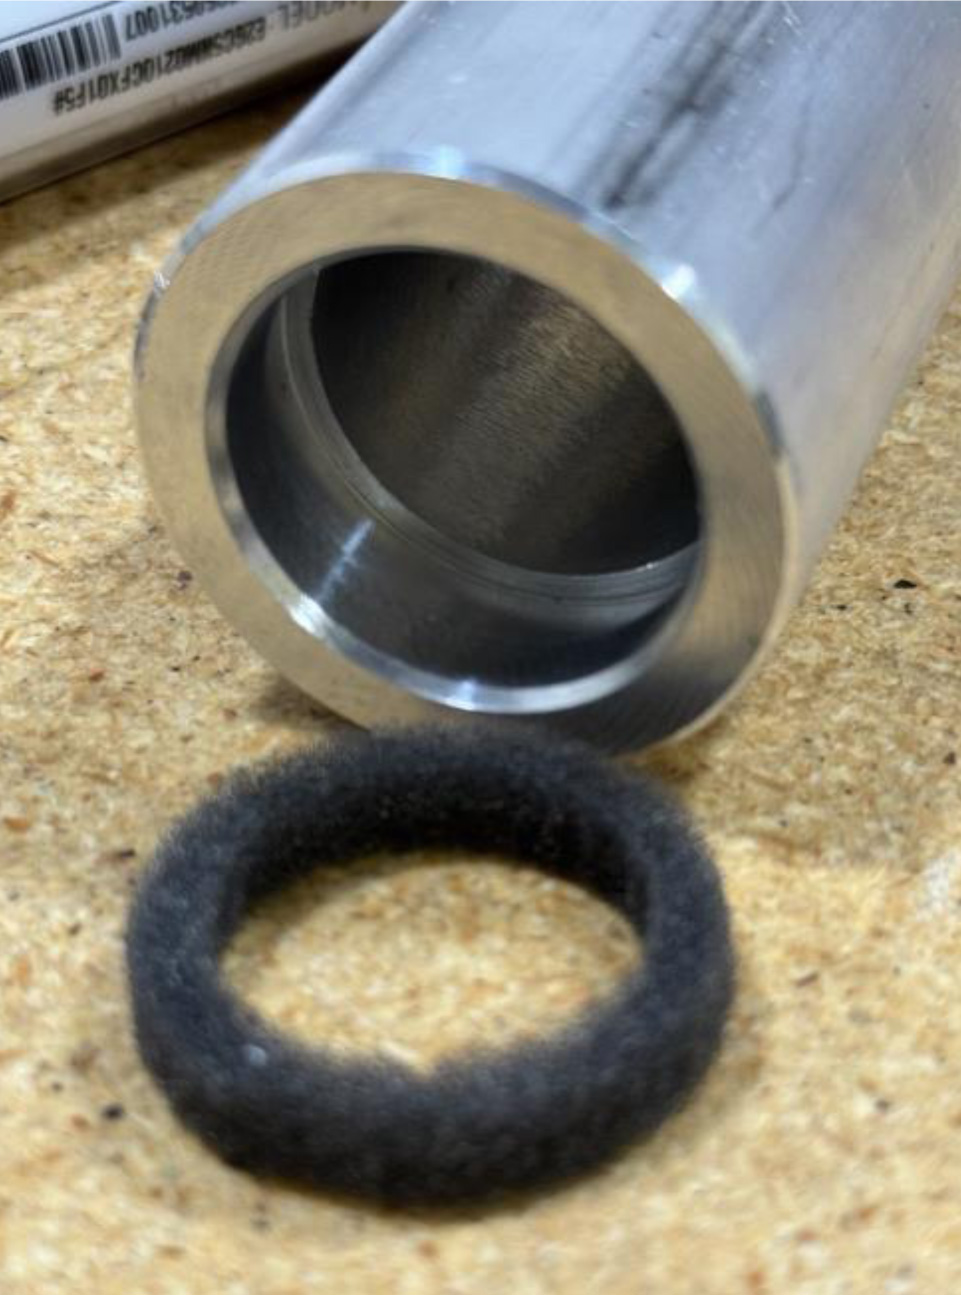
There is a ¼ inch groove in the sensor cover that holds the dust seal. This seal must be installed as the cover is slid over the sensor before reaching the threads. The seal is critical to have in place.
STEP TWO
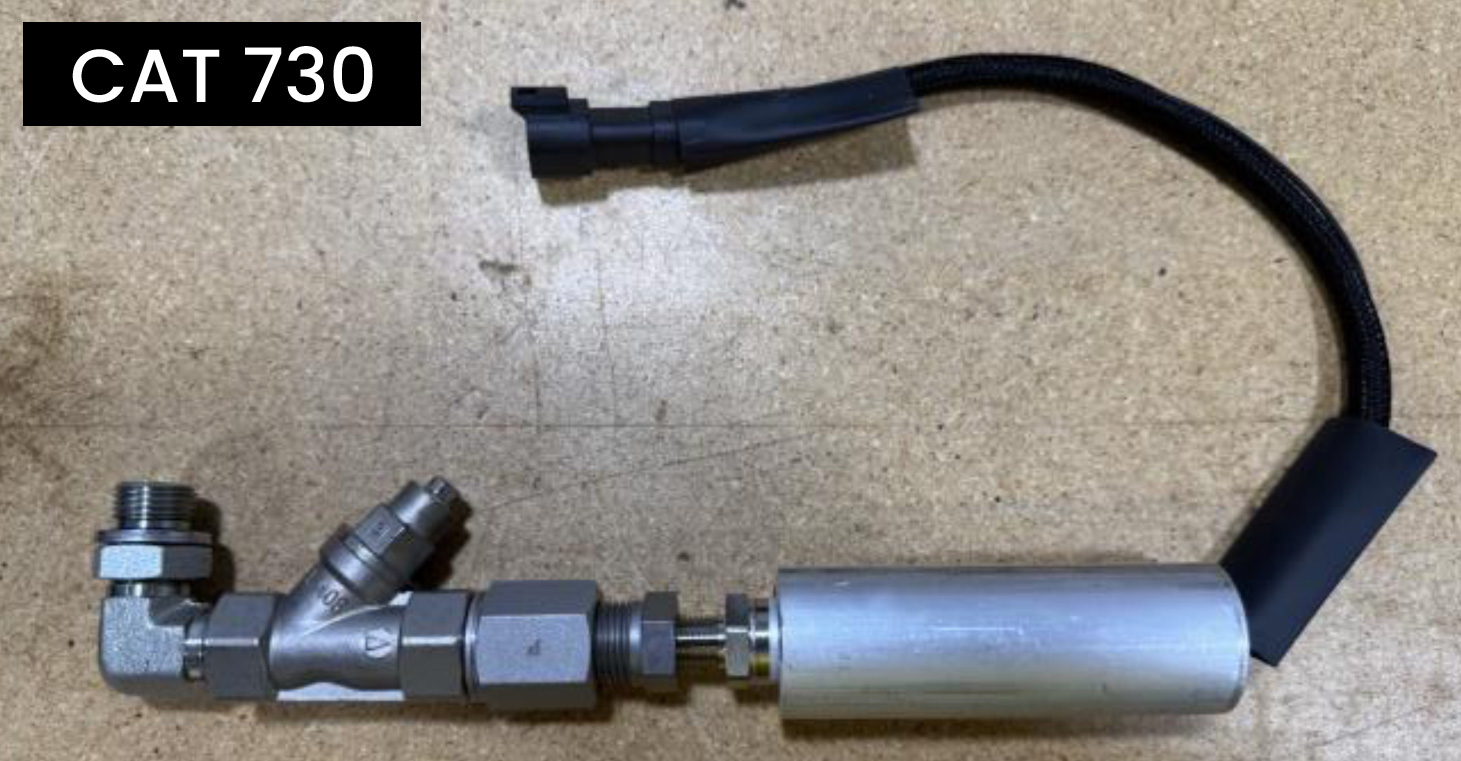
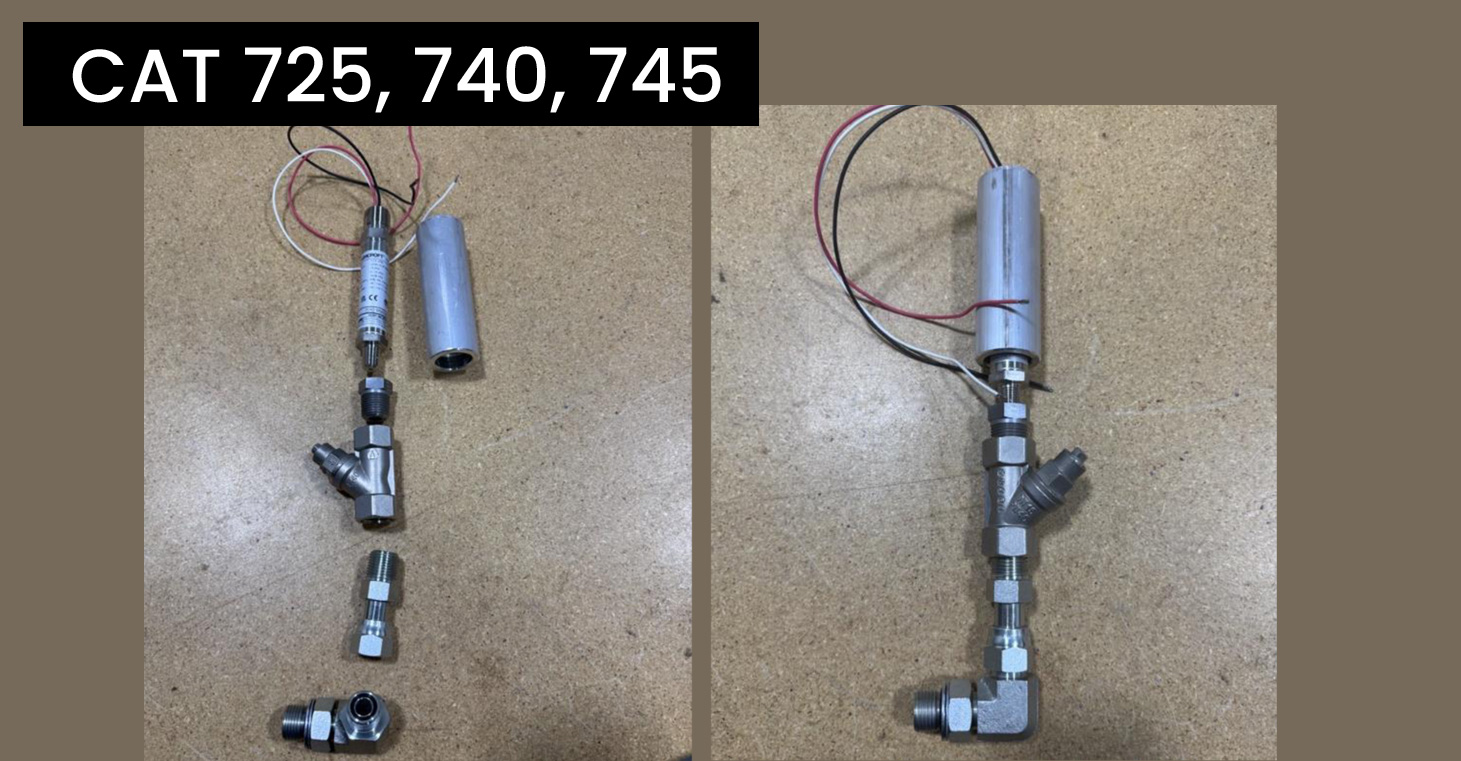
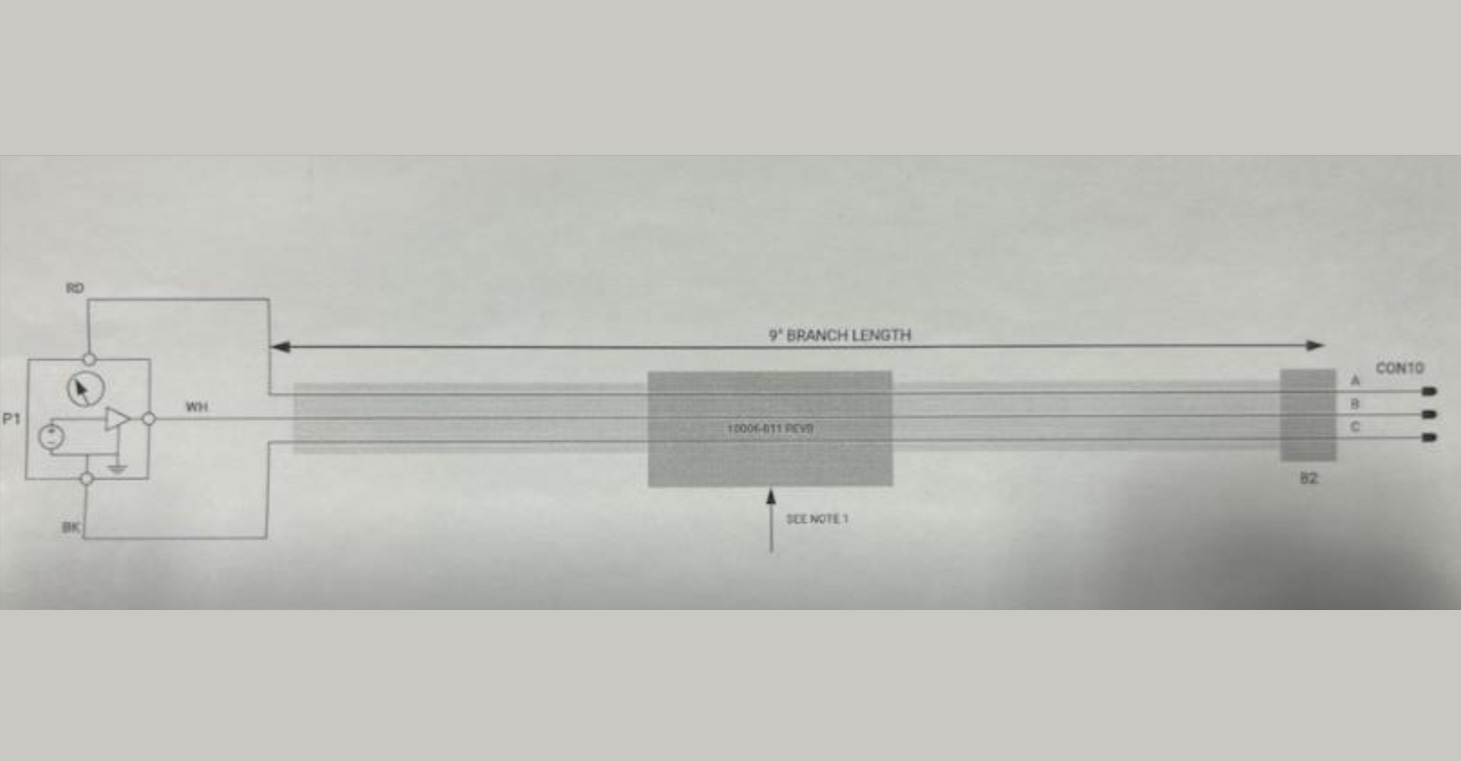
Picture of the fitting stack and the strainer. Note the strainer is not removable. It is pressed in and is not serviceable. The split loom and heat shrink are installed after threading sensor leads through the cover. Attach the three pins and insert into connector.
See next image for connector locations. It is very important to use teflon on all NPT threads. Do not use any sealer on the aluminum housing to sensor. Lightly snug cover to sensor to prevent scarring of the aluminum to steel threads. Overtightening will cause seizing.
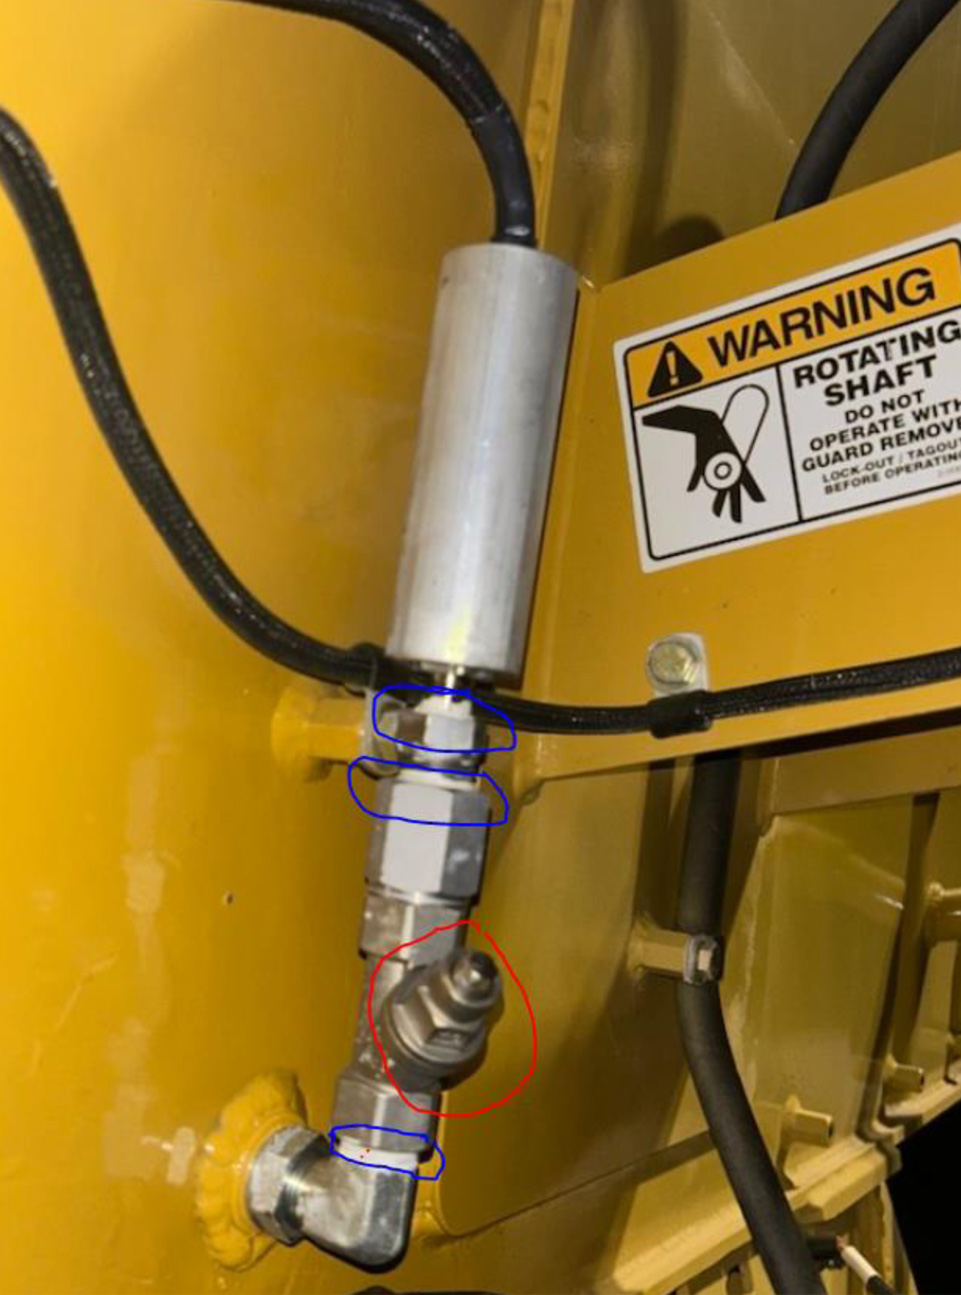
STEP THREE
Use Teflon in blue areas, noted below. Red area noted is the pressed-in strainer. Do not attempt to remove.
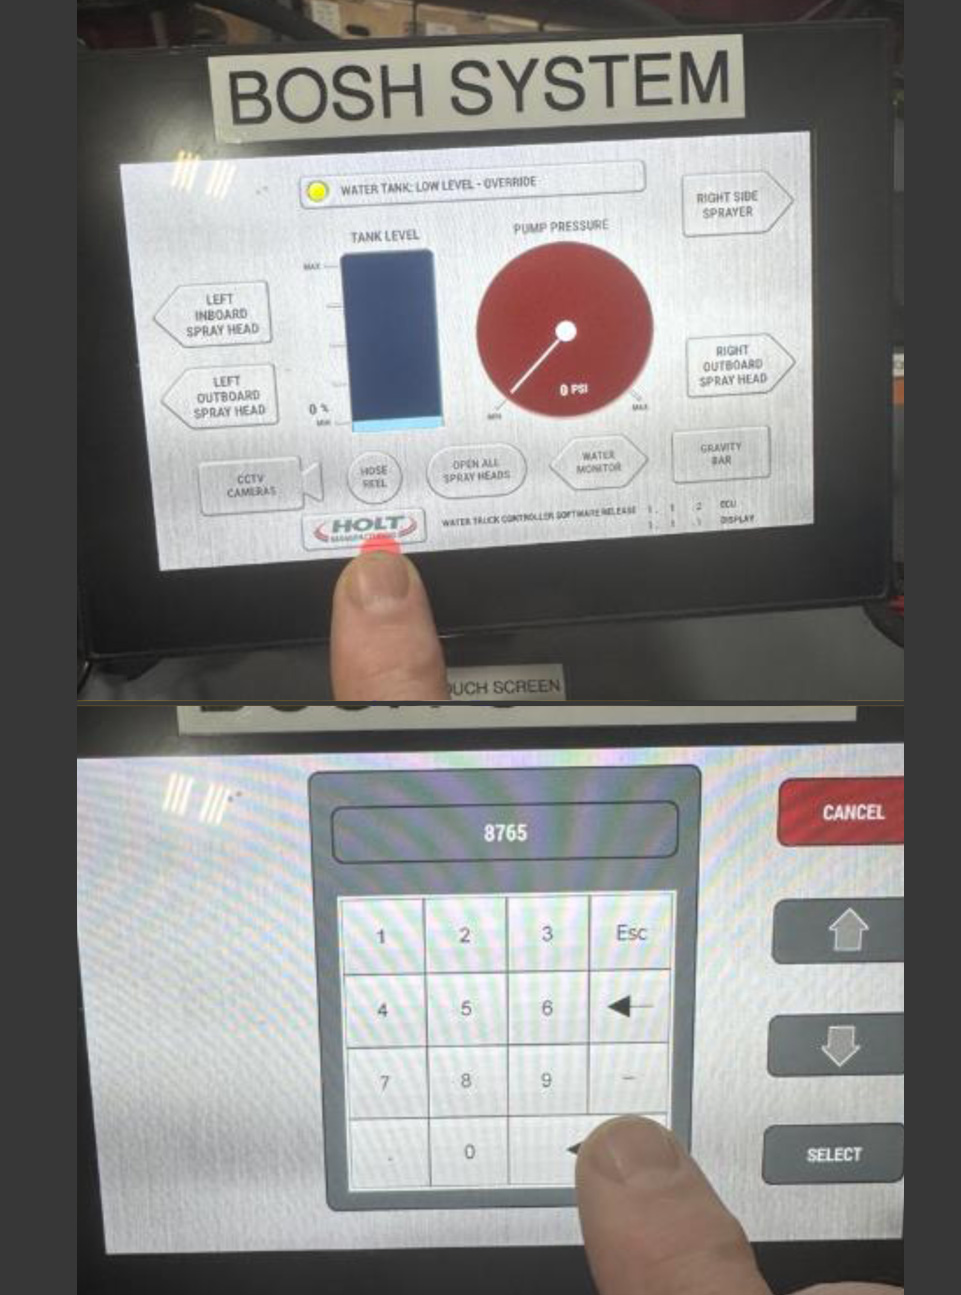
STEP FOUR
Once a new sensor is installed. The bypass must be turned off in the HMI settings. Touch and hold the HOLT MFG logo on the HMI. A keypad should appear. Put in the code 8765 and hit the arrow left button in the lower right corner of the screen.
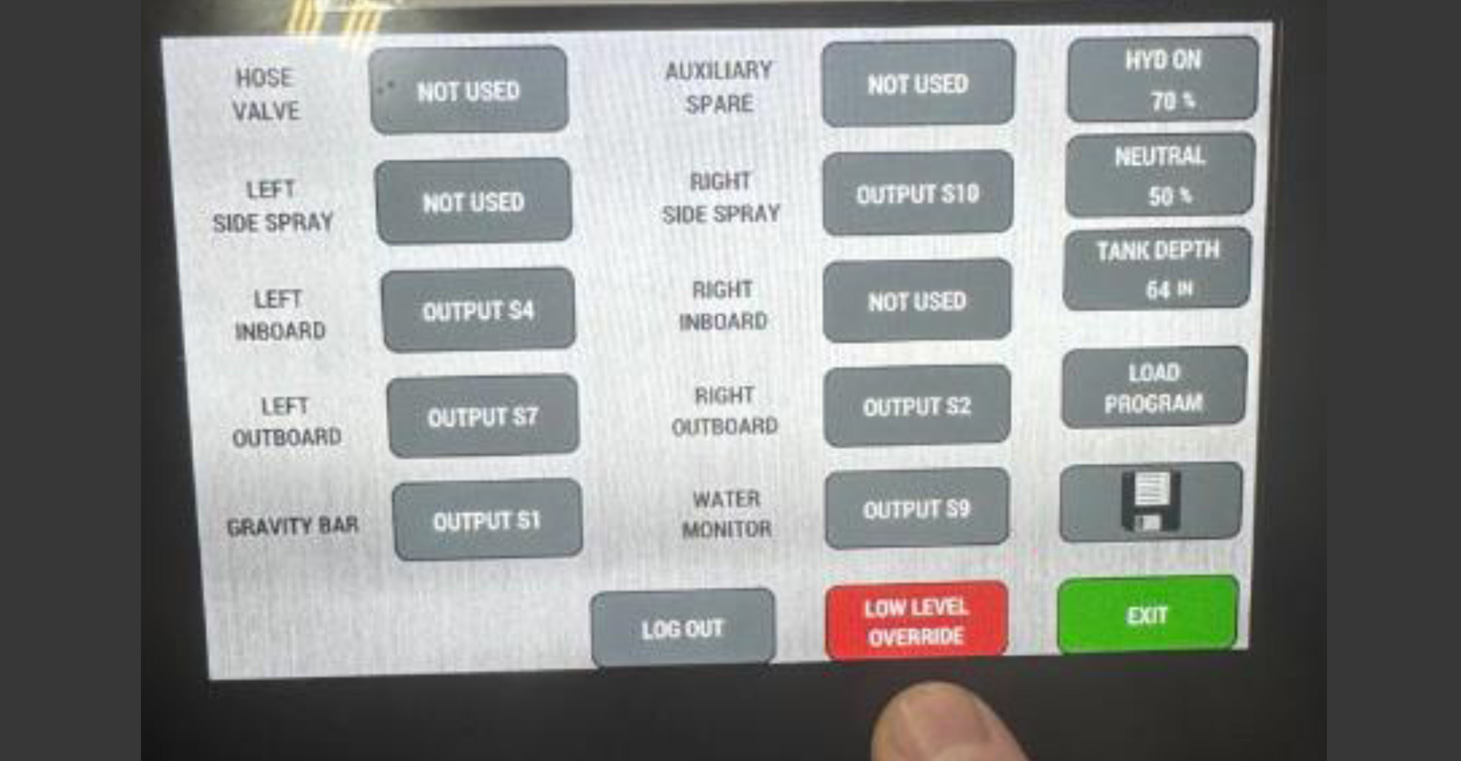
STEP FIVE
The low-level override will be in red. Touch the button and it will turn gray.
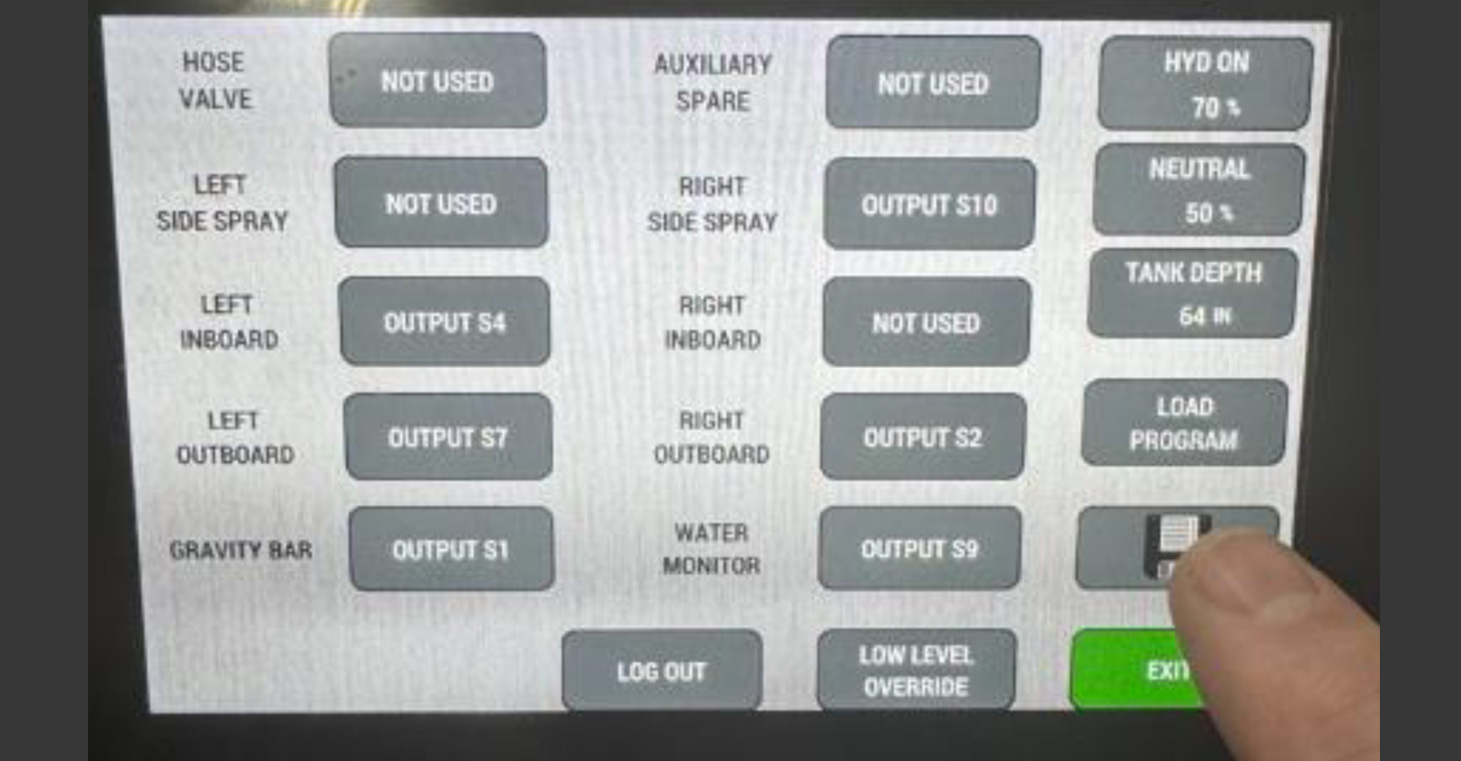
STEP SIX
Hit the save file to save the setting change.
STEP SEVEN
Exit the screen and the water level should come up on the screen.